
How to Transport Injured Turtles – Your Car Kit

If you’d like to make a big impact on your local turtle populations, learn how to transport injured turtles and sign up to drive them to Turtle Rescue League for treatment!
Every day a turtle needs help somewhere, and Turtle Rescue League is always here to provide that help. When lots of turtles are on the move at the same time, what we can’t always provide is that crucial transport from turtle trouble to our treatment center. Be a hero, be the link that puts the two together. Find out how below!
In this post, you’ll get some expanded guidance on transporting injured turtles. Our rescue page needs to be short and sweet so someone who has found an injured turtle can quickly figure out what to do. But here, we can take our time and talk about the details.
Let’s go in depth on…
- What to keep or bring in your vehicle.
- How to “package” an injured turtle for the drive to TRL or another rehabber.
- How to drive with an injured turtle in your vehicle.
What to keep in your vehicle
You might keep this stuff in your trunk or back seat all year. If you have the space we recommend it, as it can help with wildlife emergencies in general, not just injured turtles.
Otherwise, keep it in your car when you can, or somewhere it’s easy to grab on your way out the door. Nesting season is a great time to have it. This is usually in full swing at the end of May and beginning of June, but runs through the entirety of both of these months. Become a member and follow us on social media to make sure you are notified exactly when nesting season kicks off in your area.
Before we dive into equipment, please remember… If you find an injured turtle when you aren’t expecting it, perfect gear doesn’t matter. Use what you have or what you can get quickly (a nearby store may give you a box, for example), and get on the road!
Bins – these can be found at hardware or home improvement stores and sometimes Walmart. There are a few qualities that make a good turtle bin.
- Your bin should be opaque (not see-through). You want the turtle in the dark to reduce stress, and you don’t want it trying to “walk through the walls” of the bin to escape your car. That would cause stress and could worsen an existing injury.
- It should have a locking lid. It’s not fun or safe for you or a turtle for it to be loose inside your car. Look for a nice strong lock, like in the photos below. Some “locking” lids are very weak. When in doubt, duct tape!

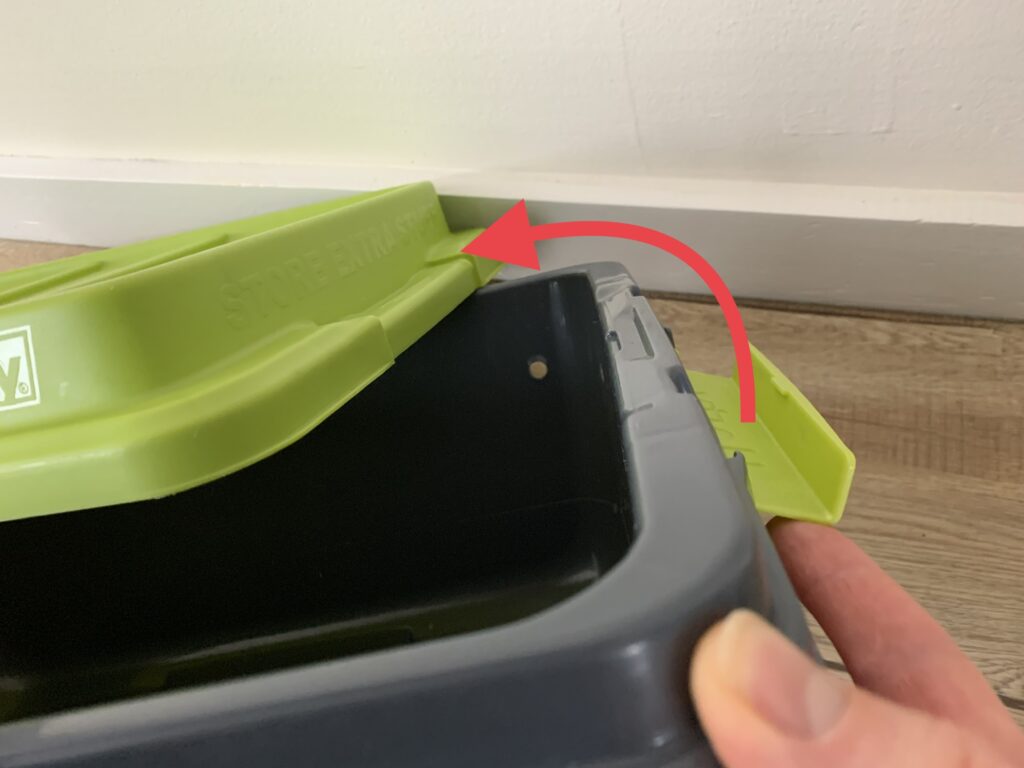
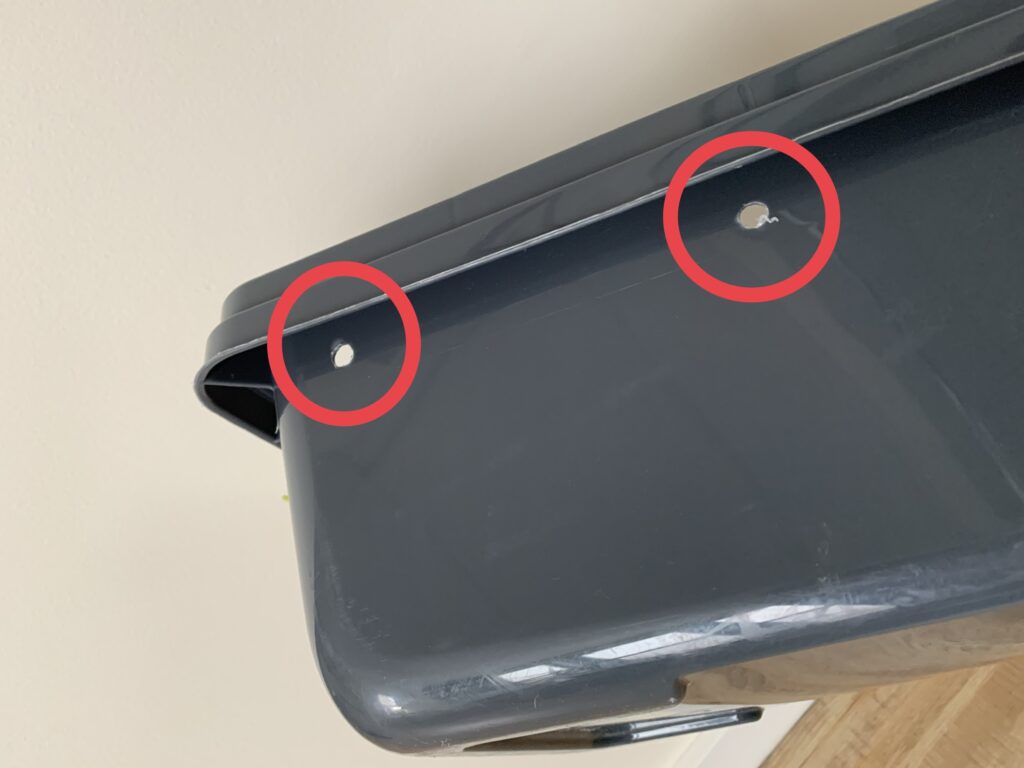
- It should have air holes. Ideally, drilled in places that still allow the bin to stay very dark. Drill from the inside out so any loose or jagged plastic doesn’t end up in turtle territory. Put a few air holes on each side.
- It should be appropriately sized. Not much bigger than the turtle, so it isn’t moving around unnecessarily during the ride, but big enough for the turtle to turn around, so it is less likely to flip over.
- For most turtles you’ll find, we like…
- Sterilite 4 gallon / 15 liter (18″ long x 12″ wide x 7″ tall).
- Hefty HI-RISE PRO 4.5 gallon / 17 liter (17″ long x 12″ wide x 8″ tall).

- You may not think you’d be up for handling a large snapping turtle, but if you’re reading this, you might find you have it in you when one needs help. So, consider keeping a large bin, too. We’ll talk about how to handle snapping turtles in an upcoming post. For large snapping turtles, we like…
- Hefty HI-RISE PRO 18 gallon / 68 liter (24″ long x 17″ wide x 14″ tall).
- Another reason to keep 2 bins – on a day when you find an injured turtle, it’s not uncommon to find another. Remember, if a bin is too big, that’s ok. Use it if you need it!
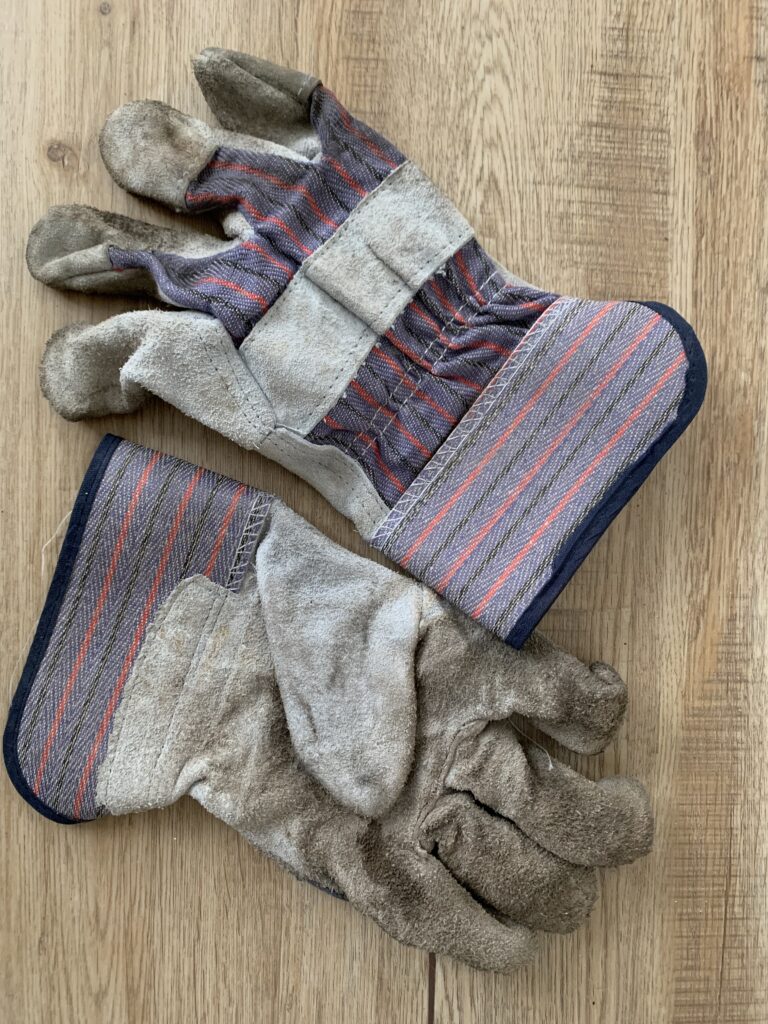
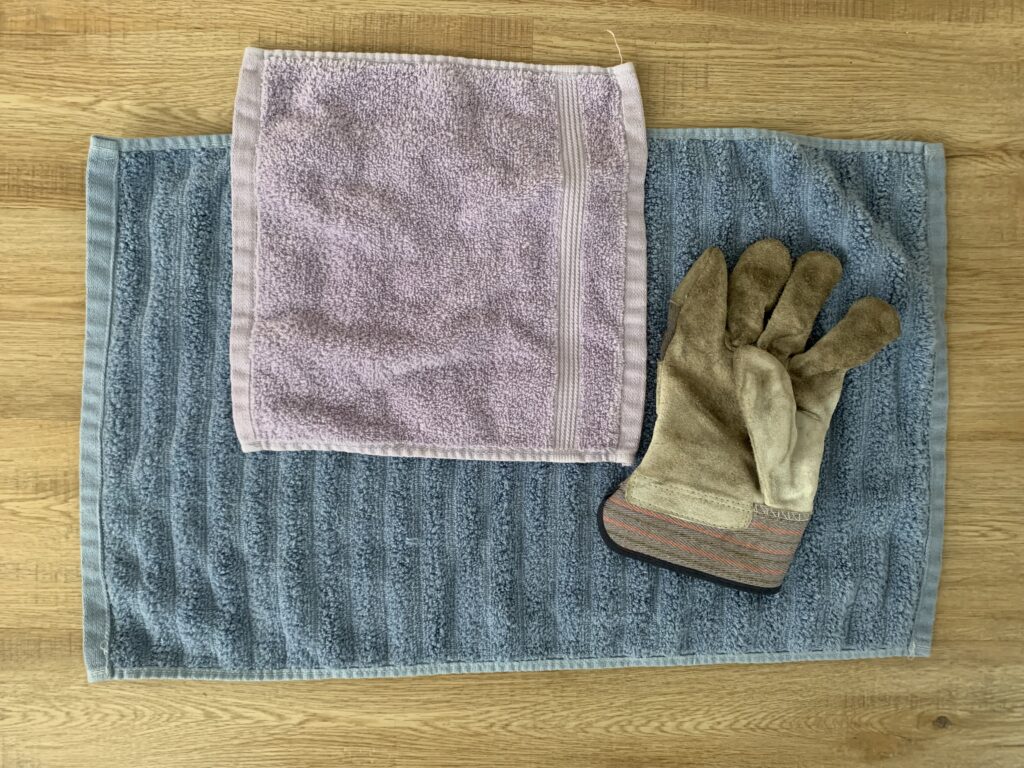
Gloves – any old glove will do. If you’ve got some hand sanitizer so you can clean up after handling, they may not be necessary at all. Gardening gloves are great because they are…
- Cheap and easy to find (hardware store, garden center, sometimes CVS).
- Tough, so reaching into thorns to grab a turtle is no problem, and they are a confidence booster with snapping turtles.
- Washable, which is nice after a rescue or at the end of a turtle season.
- If you don’t have gloves and that is preventing you from helping a turtle, use your towels or paper towels like pot holders, or even put your hands in plastic bags!
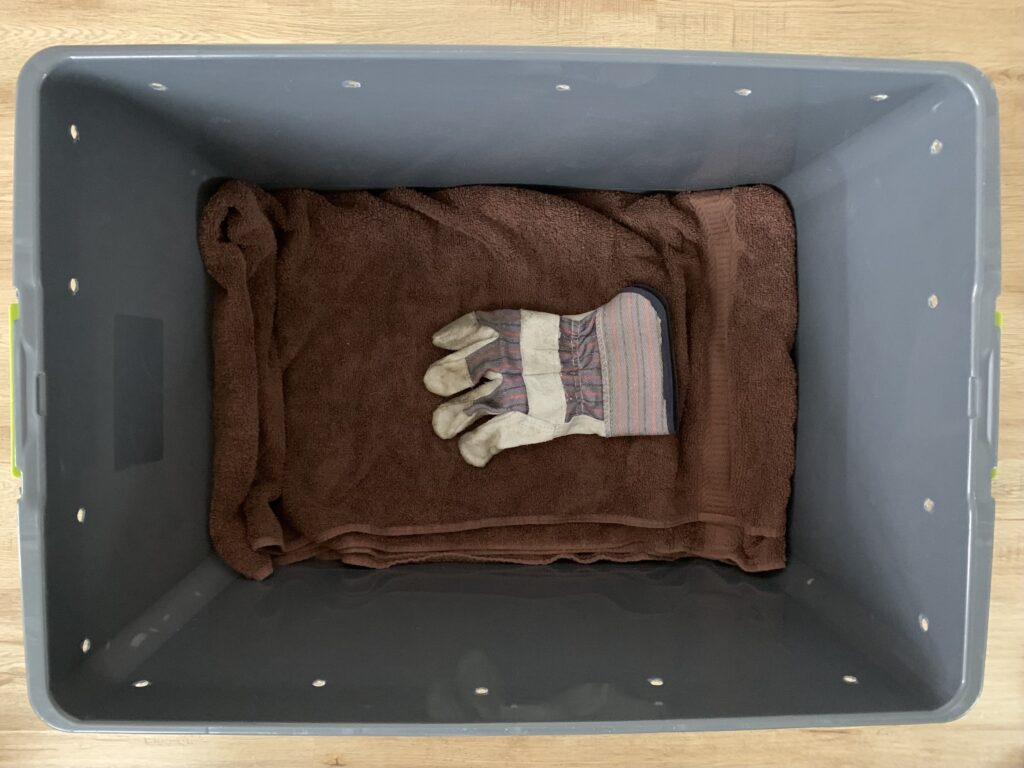
Towels – If you’re proactive and keeping bins in your car, keep 2 medium sized towels per bin as well. Towels do 3 important things for an injured turtle…
- Keep them from sliding around in the bin (floor towel).
- Help keep them in the dark and feeling hidden (top towel).
- Cool a critically overheated turtle (damp top towel).
In an emergency, just like a bin… no towel? Use paper towels. No paper towels? Don’t worry about it and get that turtle to help.
Duct tape – lid lock broken or using a cardboard box? As well as for so many other things… Duct tape to the rescue.
Clean water – for dampening a towel (see “packaging” section).
- Tap water is perfect. Bottled drinking water from a store works, too.
- Not for pouring into the transport bin!
- Turtles should not be transported in water, not even a little bit!
Hand sanitizer / wet wipes – always good to clean your hands afterward, even when you’re using gloves.
- This is for you, never to be used on a turtle!
Snacks and water for you to drink – don’t let an empty stomach or thirst be the reason you can’t help one of these amazing creatures. For example, you could always keep a box of granola bars in the back seat of your car and always bring a reusable bottle filled with fresh water to drink.
Cell phone charger – if you need to run a navigation application or spend time on a call coordinating with us or another rehabber, you don’t want to run out of juice.
Other than food, water and phone charger, store all of this stuff in your bin. When you pick up an injured turtle, you can dump everything out into your trunk, use what you need, and reorganize the next day.

How to “package” an injured turtle for the ride
Below is the ideal scenario – you know you’re going to help turtles and you’ve prepared equipment to do so. If you don’t have any or all of the below, remember, use what you can find (consider asking nearby stores, gas stations, etc.) and get the turtle to help!
DO NOT TRANSPORT THE TURTLE IN WATER! We see this a lot, and sadly, it causes serious problems for the turtle. The turtle is very likely to drown, and if it survives the ride, severe infection is almost guaranteed. All of the turtles you will find in New England can stay out of water for days or weeks. Quick side note – do not attempt to feed or provide food to an injured turtle, either.
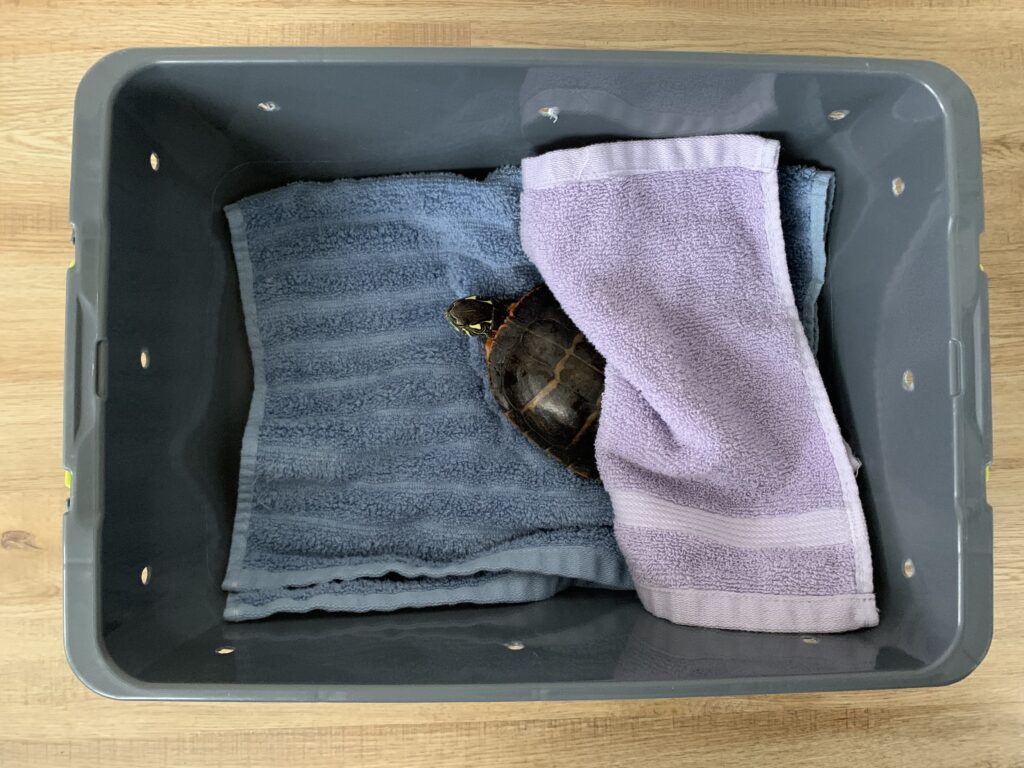
- When you’re ready to place an injured turtle in your bin, first put down a dry towel. Choose a towel that’s about the same size as the floor of your bin, and keep it with the bin so you don’t have to search for it. If the towel is too big, fold it to the right size. If it’s not big enough, it’s still better than no towel.
- Now is the time to take the best photo you can of the injured turtle. You’ll be able to send this to us so we can prepare our response at the clinic. If you can’t take a photo, that’s ok!
- Bring your bin close, so you don’t have to lift the turtle high off the ground or carry it far. With as much care as possible, pick up the turtle. Check the bottom side. Take a picture of the bottom if you can. Photo or not, it’s good for you to be able to tell us if the bottom shows signs of injury. Don’t drop the turtle. It may “pee” (it’s not really pee) or wave its legs around.
- Next, put the turtle in the middle of your bin’s floor, on top of the dry towel.
- Cover the turtle loosely with a second towel. A smaller, lighter towel is good for this. If the turtle you are helping has been in direct sun for a long time, as may be the case on the street, you can make a big difference by DAMPENING (not soaking) your top towel to cool the turtle down while you drive. Pour your clean water on the towel, and thoroughly ring it out before placing it over the turtle. Too much water hurts more than it helps. If you aren’t sure about this part, skip it and go to the next step.
- Whether your top towel is wet or dry, some turtles won’t want to stay under it. Try once or twice, and if the turtle isn’t having it, leave the top towel in the box and move on to the next step.
- Put your bin somewhere secure – in the trunk, or on the floor in the back. If that is in the bed of a truck or a trunk of a car with extra space, if you can, put things around the bin to prevent it from sliding. This can cause further injury to the turtle, even at slow speeds, and it will cause stress. A back seat, trunk or floor is better than someone holding the bin, but if necessary, someone holding it will do.

How to drive with an injured turtle in your vehicle
You’ve done all the things that feel the most important and least familiar – you’ve retrieved the injured turtle and packaged it up. But remember, even though you may do it all the time, driving is dangerous, and now you’ve got an innocent passenger who’s scared and in pain. Please, always, and definitely now, DRIVE SAFELY! We do not want you to rush an injured turtle to us like you are driving an ambulance. It takes the time that it takes. Imagine how you would feel if you ran over another turtle or caused a car accident on your journey…
While the car is still in park, please contact us so that we can coordinate with you, answer any questions you might have, make sure you know where to go and how to get there, and prepare the clinic for the treatment of this turtle.
Once you are on the road…
- Do not check on the turtle during the drive. This will do more harm than good – it will stress the turtle, and it’s dangerous to do while driving. Pulling over to check wastes time.
- Opt for keeping the turtle cool versus hot. The temperature at which you’re comfortable driving will work well for an injured turtle. If you are wondering about the temperature, err on the cool side.
- Take it slow, especially on the turns. The bin, or the turtle inside the bin, can slide around and experience impacts.
We hope this post gave you the information you need to feel comfortable transporting an injured turtle. Try driving an injured turtle this year. It will make you feel good, you’ll help a turtle, a population of turtles and an entire ecosystem. Plus, we’d love to meet you.
Whether you drive turtles or not, you can support the Turtle Rescue League and our patients by making a single or a recurring donation of any amount. We rely completely on your support. Thank you!